ShipStation Integration
The ShipStation integration app for Commerce7 is owned and built by a 3rd party developer (Treefrog Digital). For questions regarding custom reports, setup, or support, please contact us at hello@treefrogdigital.com.
App Technical Description
The Commerce7 integration with ShipStation enables automated order fulfillment and shipping label management. It connects Commerce7 stores with ShipStation via a custom store, allowing real-time synchronization of orders, products, and shipment data.
For quick access to the topic you are looking for, click the corresponding link below:
- Setup Instructions
- Set up a Custom Store in ShipStation
- General Settings and Field Mapping
- Import Orders
- Shipment Notifications
- Manually Importing Orders to ShipStation
Setup Instructions
- Sign up for a ShipStation account.
- Install the App on Commerce7
- From the Commerce7 Admin Panel, Go to Apps. (You will need to have Admin Owner role to install the app)
- Search for ShipStation by Treefrog Digital, and click on the app.
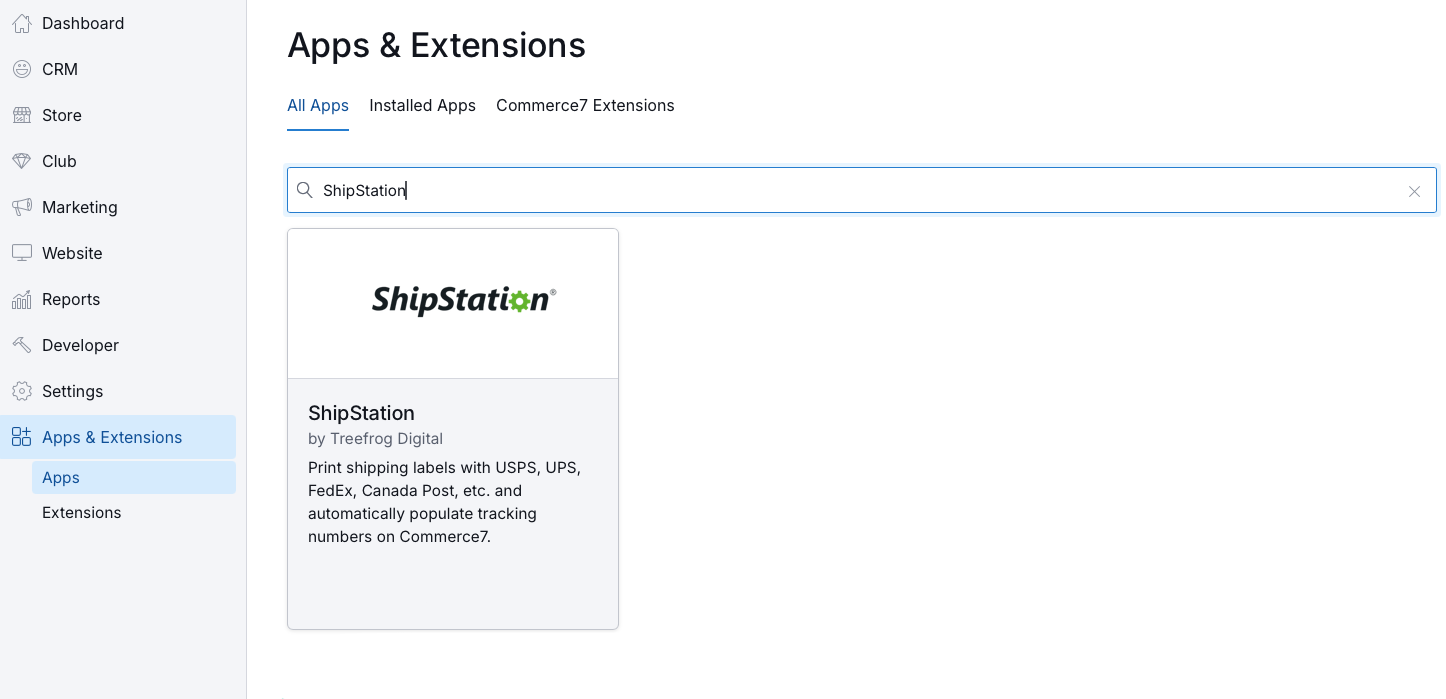
- Enter a username and password (make sure to note them, as you’ll need them in the following steps), then click install.

Set up a Custom Store in ShipStation
- Sign in to ShipStation, and add a custom store.
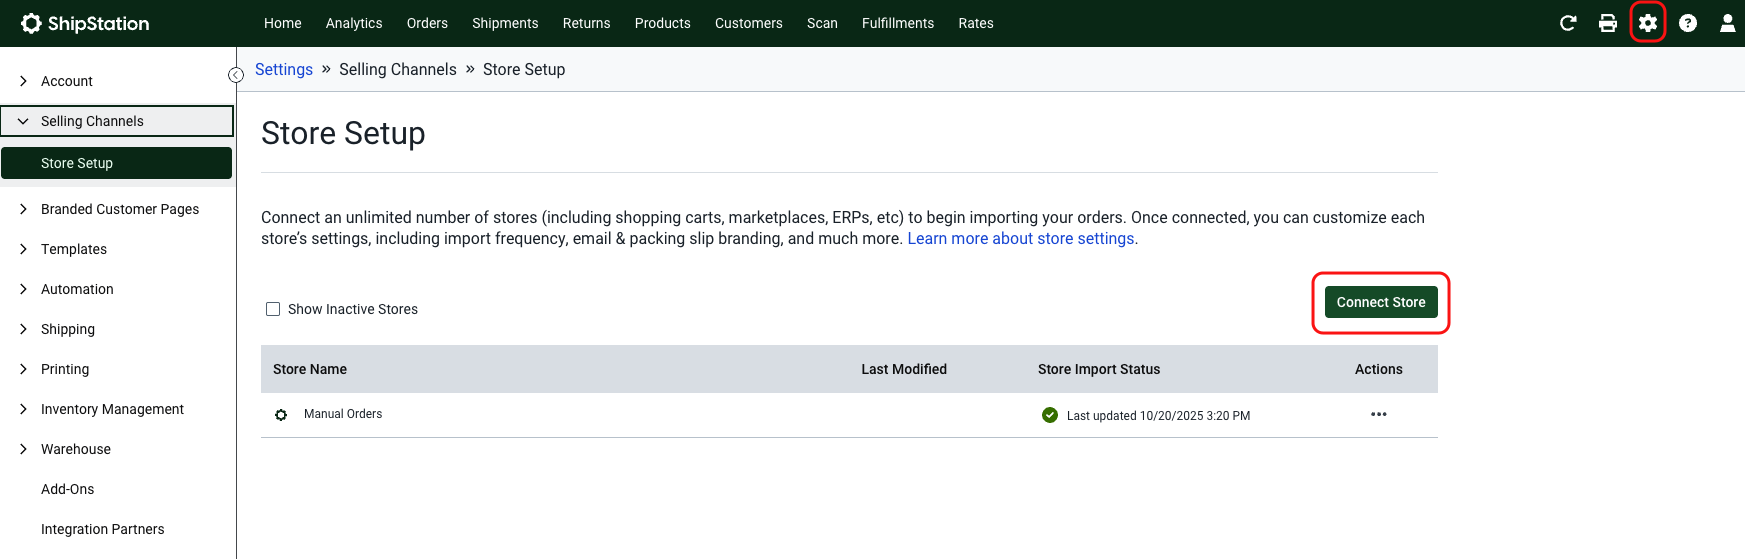
- Log in to ShipStation, then head to Settings (look for the gear icon in the upper right corner)
- Click on Selling Channels > Store Setup > Connect Store and search for Custom Store.
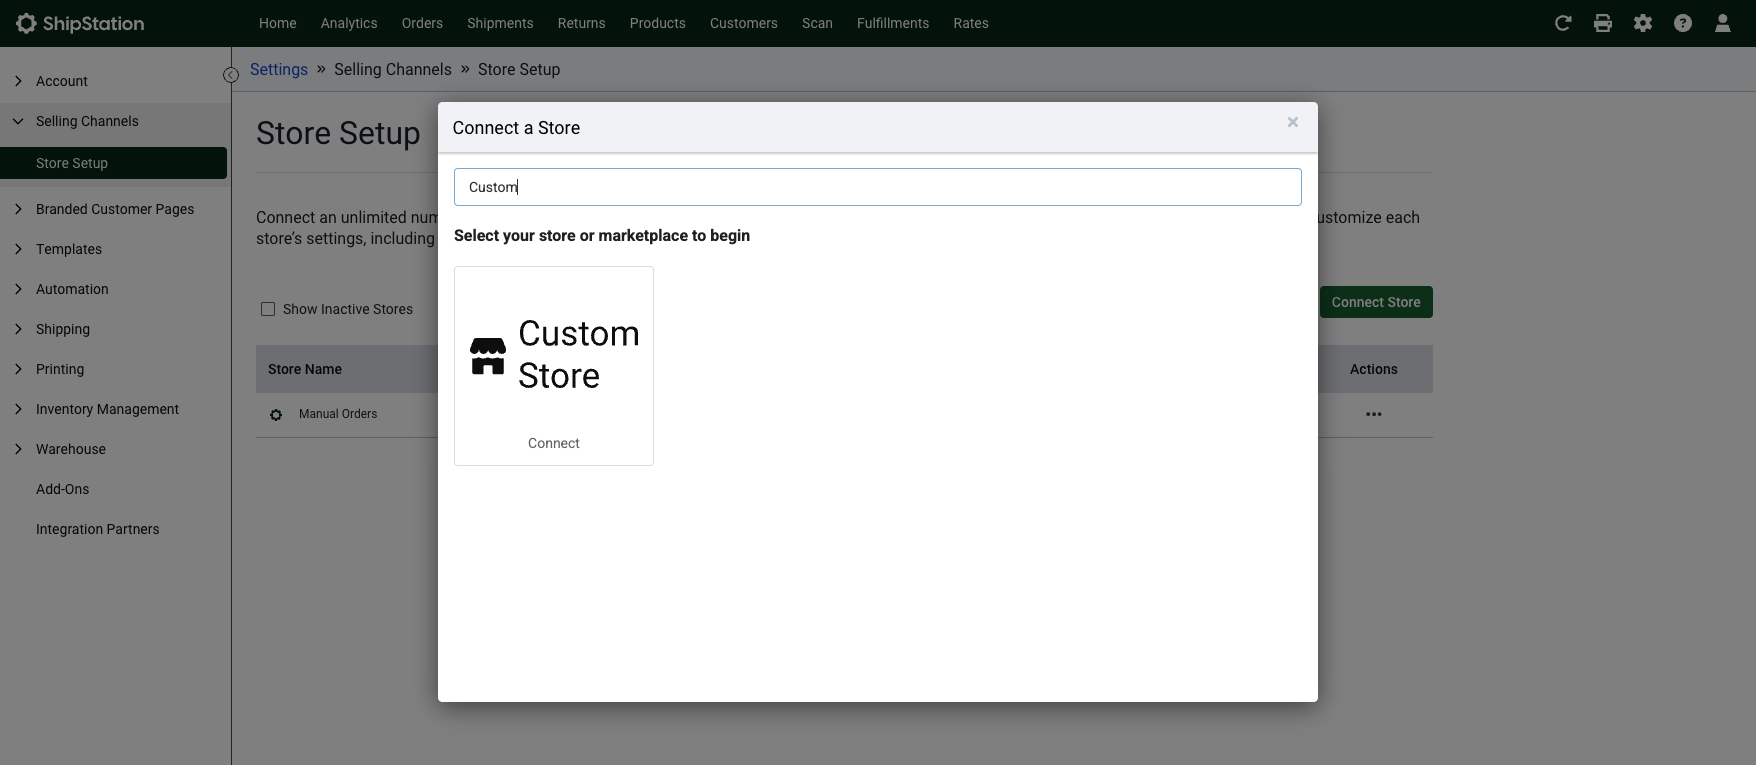
4. Fill in the required information
- Custom XML URL:
https://shipstationapi.tfdapps.com/v2/orders/{tenantId} (replace {tenantId} with your Commerce7 tenant ID)
This can be obtained from the URL on your Commerce7 instance, and it would be the part that appears before the .admin.platform.commerce7.com. In the example below, the tenant Id is treefrog-digital, so the “URL to custom CML Page” would be: https://shipstationapi.tfdapps.com/v2/orders/treefrog-digital

- Username/Password: Use the same username and password you provided when installing the integration in Commerce7
- Awaiting Payment Status: unpaid
- Shipped Status: shipped
- Cancelled Status: cancelled
- On-Hold Status: on_hold
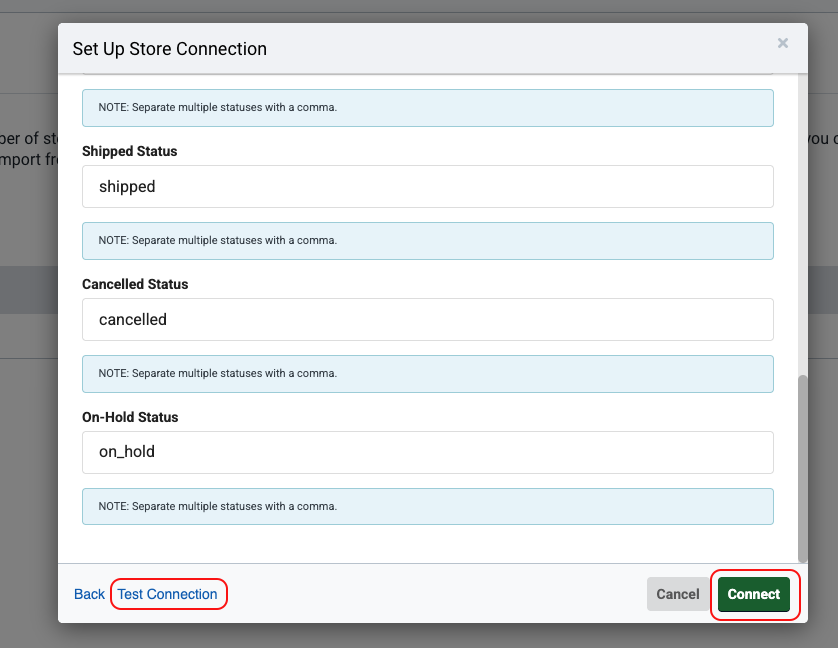
5. Test the connection using Test Connection to verify that the username, password, and URL details are working. If confirmed, then choose “Connect”.
Note: Once the custom store has been set up, new orders will automatically flow into ShipStation. However, any orders older than 2 days will need to be imported manually. Please refer to the Manually Importing Orders section of this documentation for guidance.
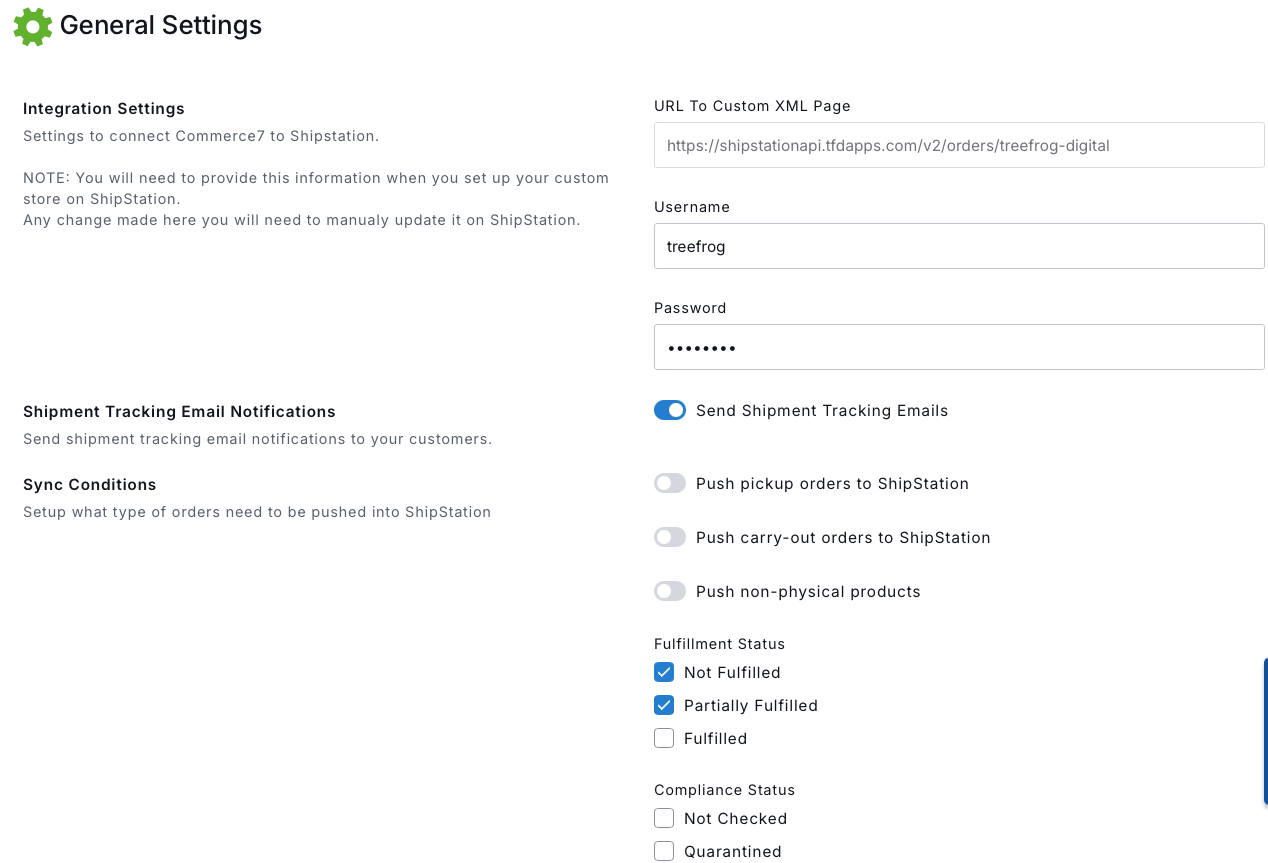
General Settings and Field Mapping
After connecting the account, you can further configure how orders and data sync between Commerce7 and ShipStation, including mapping which fields will be sent to ShipStation.
6. Customize your settings in the app settings page
- Go to your Commerce7 admin panel.
- Select Apps & Extensions > ShipStation > Settings.
- From General Settings, you can:
- Update your username and password – Ensure your credentials are correct for syncing.
- Review the Custom XML page URL – This specifies where ShipStation should retrieve order data from Commerce7.
- Select sync conditions – Set up what type of orders need to be pushed to ShipStation. You can push pickup orders, carry-out orders, and non-physical products.
- Set field mapping – Map Commerce7 order fields (customer info, order status, requested ship date, etc.) to ShipStation fields for accurate data transfer.
7. Map your Commerce 7 order fields to ShipStation to ensure all order information transfers correctly under Field Mapping.
From the Field Mapping section under the app General Settings, you can map which fields to send to ShipStation. You can map one field to Internal Notes and up to three additional fields as custom fields. When done, click Save.
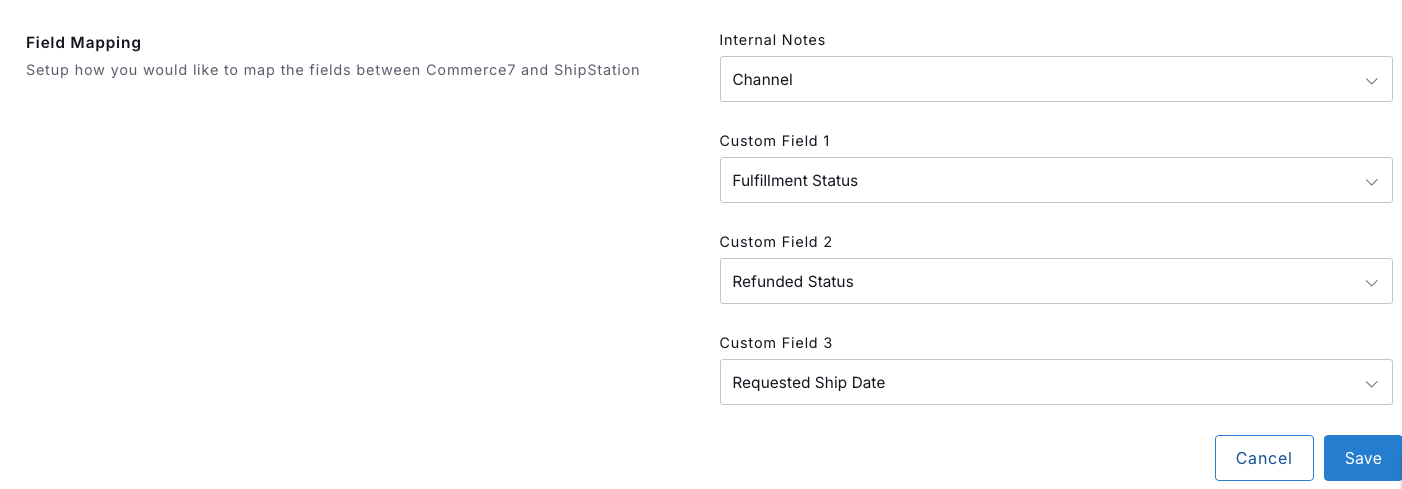
Available fields to map for C7 Orders:
- Customer Meta Data
- Channel
- Club Title
- Fulfillment Status
- Order Delivery Method
- Requested Ship Date
- Refunded Status
- Shipment Build Status
- Compliance Status
Import Orders
If needed, ShipStation users can manually trigger order updates from their ShipStation account by hovering over the import icon and selecting Commerce7 from the options.
- In ShipStation, click the Import icon in the top right corner (look for the inverted arrow icon)

- Choose to Update All Stores (or select a specific store).
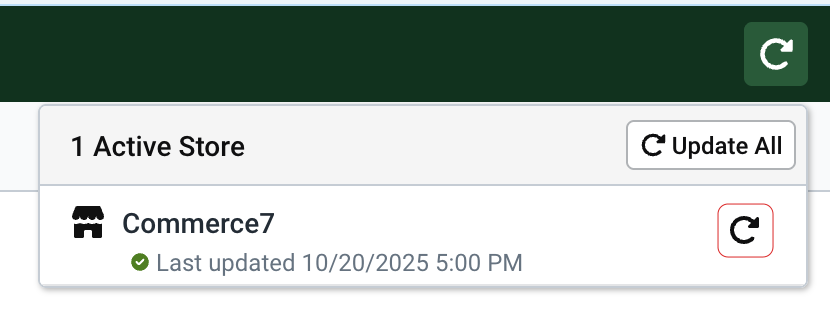
- Wait for confirmation that the import is complete. ShipStation will display a pop-up message to let you know when the import is complete.
The time it takes to import orders will vary depending on the volume of orders from each store.
Additionally, users can enable an auto-update feature, allowing ShipStation to update Commerce7 orders periodically. The auto-update frequency depends on the user's history of manual updates, as well as several other factors.
To enable or disable Automatic Import:
- Go to Settings → Selling Channels → Store Setup
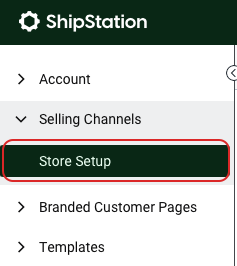
- From the action column, click on the … three dots beside your custom store. Then, click on Edit Store Details.
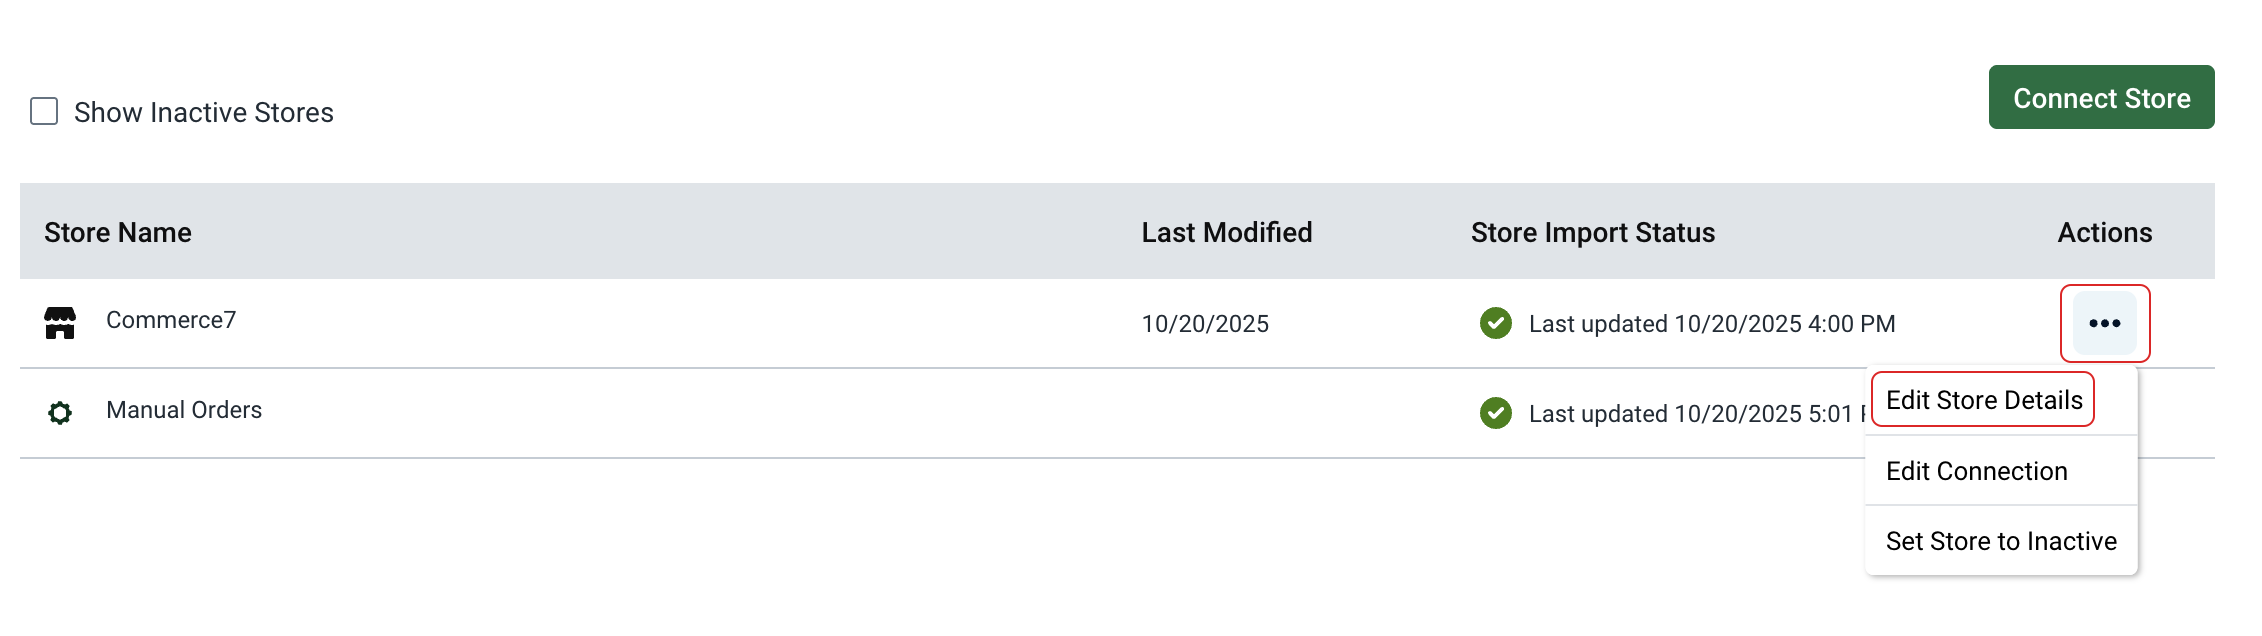
- Go to the General tab and select the Automatic Import option to enable ShipStation to refresh your store automatically
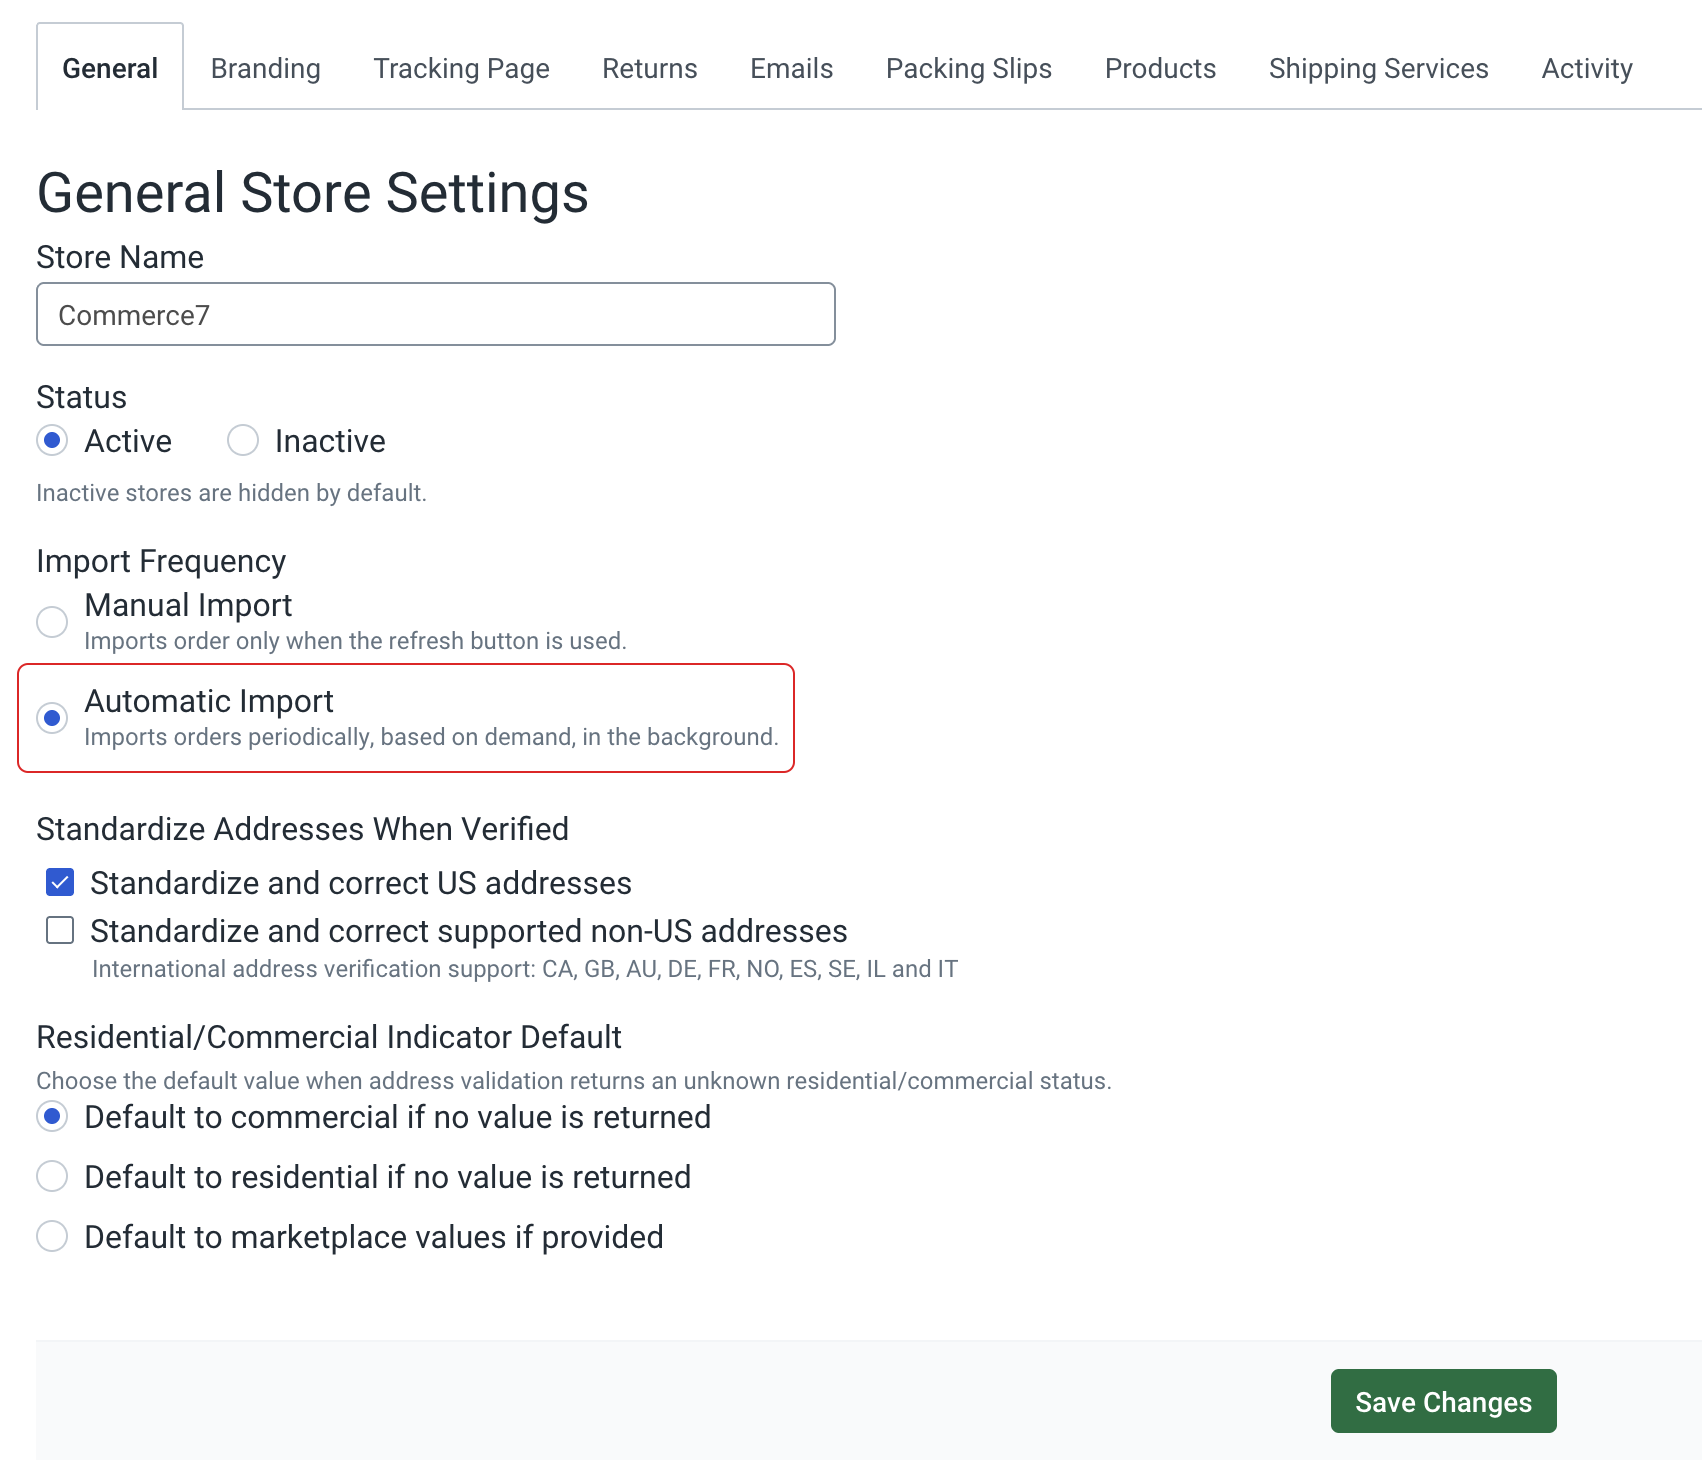
- Click Save Changes.
Shipment Notifications
Once a label for an order has been created inside ShipStation, this triggers a Notification to Commerce7 to update its fulfillment status and add the tracking number for the order.
Manually Importing Orders to ShipStation
Any orders older than 2 days will need to be imported manually. To manually import your orders from Commerce7, you can:
Option 1: Export your Unfilled Orders from C7. This will generate a .csv file that you can upload to ShipStation. Since the file is not formatted for ShipStation, some field mapping will be required during the upload process.
You can refer to this article for detailed instructions: Import Orders via CSV – ShipStation Help
Option 2: Run the Custom Report – ShipStation Import Order using our Custom Report App. This report will generate a .csv file already formatted for ShipStation, so no additional mapping is needed. However, you’ll need to have our Custom Report App installed in C7 to use this option.